Random thoughts of a fiber enthusiast - mostly fiber related, sometimes coherent

Category: Technique Page 1 of 8

On Binding Off

I love Jeny’s Surprisingly Stretchy Bind Off. I use it for socks or anything else that requires give.*

I used it in my Mitered Non-Cross Blanket.

However, that extra yarn over also means more yarn is used. That’s the point, isn’t it? The extra yarn gives you more stretch. Quite honestly, it also was not necessary in a garter stitch blanket. Seriously. By the time I thought about it, it was too late to switch to a different bind off method unless I wanted to rip  the border on all the finished squares and re-knit them. I wasn’t willing to do that, but I was worried about running out of the natural colored yarn I was using for the border.

BindOffs

click to enlarge

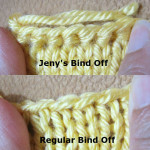
Why is it necessary to re-knit those squares? Jeny’s bound off stitch is visually different from regular bind off stitch.

From the pictures on the left, you can see that bound off stitches with Jeny’s method look like they are wearing turtle neck sweaters. That’s from the extra yarn over in the bind off.

However, regular bind offs have a tendency draw in if you aren’t careful. Why? All that extra stitch manipulation pulls and tugs at the recently bound off stitch, which makes them tighter.

SuspendedBindOff

click to enlarge

What do I do?

I use a suspended bind off. What’s suspended bind off? Basically, you keep the just bound off stitch on the left hand needle while you knit into the new stitch. This prevents you from pulling on the recently bound off stitch and distorting the bound off edge. I used suspended bind off in the above picture (below Jeny’s bind off.)

This bind off is not stretchy at all, when compared with other bind off methods. If stretch is not required, like for a blanket or a flat edge of a sweater or scarf, this is an excellent bind off.

* The only bind off I like better is Elizabeth Zimmerman’s sewn bind off, but that requires extra equipment — a darning needle, and guesstimating how much extra yarn you need for the bind off beforehand. I never guess right. If you are binding off a very long edge, the length gets unwieldy and ratty from drawing through all those stitches, unless you are willing to splice in new yarn.

(Yes, I know I desperately need a manicure.)

Zooming Along

During one of the many glasses of wine we consumed during SOAR, I watched Shelia weaving little squares with her Zoom Loom for a Chanel like jacket, using leftover sock/fingering weight yarn. I noticed that she would sometimes double up her yarn before weaving. When asked, she said the fabric was not firm enough when weaving with certain yarns singly.

A light bulb turned on for me. I had been planning a small lap blanket with leftover sock yarn, with squares woven on the Zoom Loom. I had been merrily weaving little square with the sock yarn singly.

After I returned home from SOAR, I pulled out my Zoom Loom and my (very) small pile of woven squares and took another look. Yes, some are really really sleazy. Why I didn’t notice that before is beyond me since I really do know better (see pictures at the bottom).

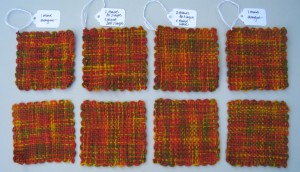
Next, I pulled out a large ball of leftover sock yarn and wove up 8 squares in 4 different variations. (One of many advantages of having small feet is that I only use less than 2/3 of a skein of sock yarn for a pair of socks.) Here are the squares, all laid out on a board.

Top Row: Straight off the loom (okay, it’s been a few months, but you get the idea)
Bottom Row: Soaked in warm water with Wool Wash, then pressed lightly with a warm iron between towels

ZoomSquaresAll

(click to enlarge)

Left to Right:

  1. Single strand for all 4 layers
  2. 2 strands for first 2 layers, single for the last 2
  3. 2 strands for the first 3 layers, single for the last 1 (the weaving layer)
  4. 2 strands for all 4 layers

Unfortunately, you can’t see the density of the fabric very well. I hung these up on my drying rack so you can see the density of the weave.

ZoomSquaresPre

Before Finishing (click to enlarge)

As you can see, the single strand is very loosely woven. So much so, the threads shifted as soon as the square was removed from the loom, and continued to do so with additional handling.

Using 2 strands for the first 2 layers, and 1 strand for the last 2 was much better, but you can still see a lot of daylight through it.

Using 2 strands throughout was miserable to weave in that last layer. The fabric is very very dense.

But how does it look after wet finishing?

ZoomSquaresPost

After Finishing (click to enlarge)

Here they are washed and pressed. As you can see, the single strand square is behaving much better.

Depending on what the final product will be, I would likely choose between #2 or #3. In the yarn I chose, I don’t see/feel enough difference between #3 and #4 to warrant the extra frustration of trying to weave in that last layer with 2 strands.

The downside of doubling up the yarn is that the colors are not as clear. This could be mitigated if I chose to pair it with a solid colored yarn as my second strand.

What this exercise tells me is that I should sample sample sample before I commit to a full project. I had been just happy to go along with using 1 strand through out. Now, having seen my options, it would not be the fabric I would choose for a blanket.

Shaking it up

I have been happily using my basic sock recipe for years. Last month, 2 things happened:

  1. I heard about Cat’s new Sweet Tomato Heel, and
  2. I watched Vicki’s podcast about her vanilla sock recipe.

I’ve had a sock on the needles for months. It’s been my meeting knitting project, except I’ve been busy taking notes and not much time for knitting. However, I did just turn the heel and was making my way toward the cuff. At this rate, who knew when I would get to my next pair of socks?

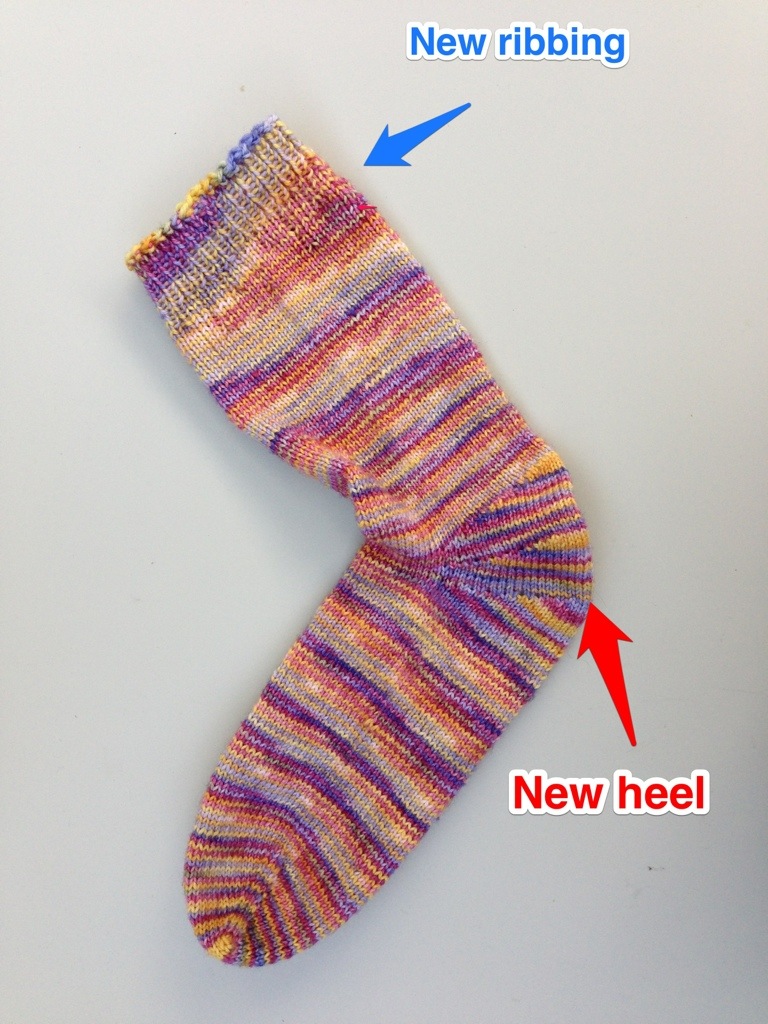
So I ripped this sock back to the heel and tried out Cat’s new heel. When I got to approximately where I normally start my ribbing, I tried out Vicki’s method of 7×1 ribbing for a few rounds (5), 3×1 ribbing for a few more rounds (5), then continue with 1×1 ribbing until desired height.

Finished Sock with mods

It’s amazing how much faster you work when you are trying out new things. You can’t wait for it to finish to try it on. A train ride to the city and back (an hour each way) didn’t hurt.

So, what do I think?

Eh.

Mixed results. The heel is a bust for two reason:

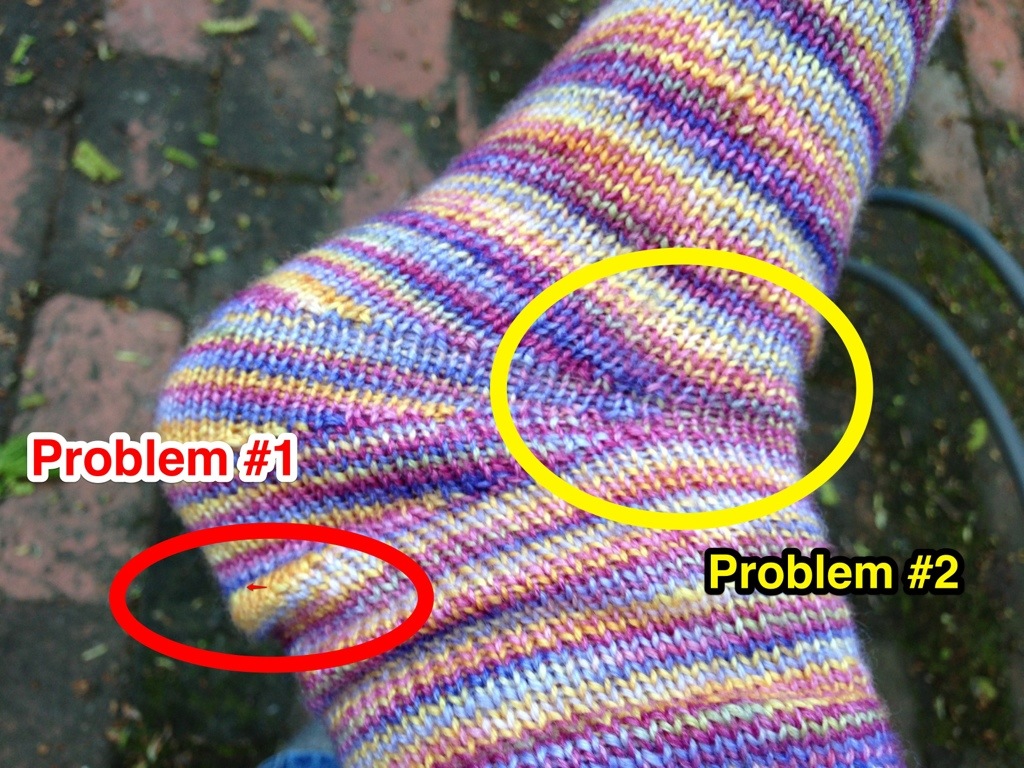
  1. The third short row didn’t fit my heel bone. But as Cat said, that can be adjusted. I could stop short of the full complement of short rows. That didn’t bother me as much as the next problem.
  2. Cat has you knit a couple of rounds plain in between the 3 short row segments. After the first segment, the sock is just too shallow for my high instep, and I found that those two rounds were really binding on my ankle. I didn’t notice it when I tried it on immediately after finishing the heel because the rest of the sock wasn’t in place and it didn’t sit in its normally location.

The first problem is solvable, but the second one was the clincher. This heel just doesn’t work on my foot. The whole point of knitting my own sock is to make socks that fit me like a glove, which, for a foot, is a sock. Ha!

But to its credit, I do like how it looks when laid flat!

Now, to Vicki’s ribbed cuff. That was interesting and fit well. She make hers that way for aesthetics. How my cuffs looked never really bothered me as long as they fit well and didn’t sag. So the ribbing is a wash. Just something else to tuck into my bag of tricks.

Yup. It’s been ripped. I’ve started the heel for the third time on this sock.

The yarn is 100% merino from Fancy Image, so it must mean I picked it up from Madrona at some point. And it also means that this pair of socks has a life expectancy of about 2 years. I hope it takes less than that to make them.

Page 1 of 8

Powered by WordPress & Theme by Anders Norén