Random thoughts of a fiber enthusiast - mostly fiber related, sometimes coherent

Category: Knit Page 1 of 88

Faux-mbas

My basic sock recipe for the past 15+ years has been toe up with short row heels. When I stumbled across The Purl Bug’s Heel Tab for Short Socks recipe, I knew what I needed to do — adapt it for toe up. If you have ever knit a picot or folded hem, then you are half way there. If you have ever knit short row heels in the past, you are half way there. If you have done both, then this should be a piece of cake for you.

The recipe below is for any toe up sock pattern. It begins after the heel is complete and you are back to knitting in the round for the leg. And remember, as with any recipe, it’s easy to adapt to whatever fits you best.

Ankle. I knit about 1 cm plain (approx. 5 rounds) before starting the heel tab. You can make this longer or shorter. I find 1 cm is perfect for me.

Setup for Heel Tab. I knit the heel tab in a different yarn than what I used for my socks because it is easier for me to see where to stitch the tab down in a straight line. You can knit the entire thing in a single yarn/color. You just need to pay a bit more attention to make sure you stay on the correct row. I recommend using a different color for your first pair so you understand what you are doing.

Knit 8 rounds plain.

This is in addition to the 5 rounds for the ankle.

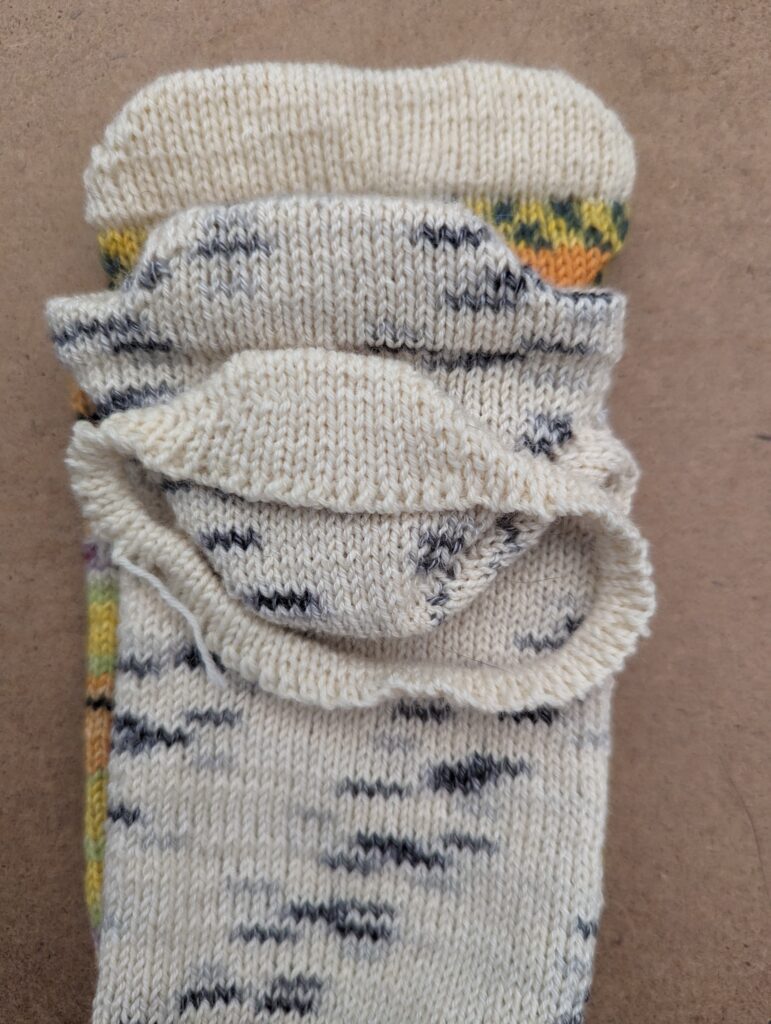
Bottom: Original instructions
Middle: 5 sts unworked
Top: Full width (1 st unworked)

First half of the Heel Tab. The heel tab is made of 3 sets (6 rows) of short rows along the back of the foot. The heel tab from the original instructions were too small/narrow (9 stitches unworked on each side) for my trail shoes so I played around with different with different widths until I settled on 5 stitches unworked on each side. I had a bit of a Goldilock moment before I settled on a width I liked. You may need to experiment a bit as well.

Notes: I knit socks with 5 double points, 2 circulars, or on a single circular needle using the Magic Loop method. This makes it easy for me to differentiate the front from the back of the sock. If you use double points, with your stitches distributed across 3 needles, just know that when I said “the end” I mean each side of the foot.

3 sets of short rows completed

On the back side of the sock (the side with the heel)

  • Knit to 5 sts before the end, w&t *
  • Purl to 5 sts before the end, w&t
  • Knit to 1 st before the previous wrap, w&t
  • Purl to 1 st before the previous wrap, w&t (2 sets of wraps on each side)
  • Knit to 1 st before the previous wrap, w&t
  • Purl to 1 st before the previous wrap, w&t (3 sets of wraps on each side)

Notes: I haven’t looked back since I learned the Fish Lips Kiss Heel method, but you can use your favorite short row method. Replace “w&t” (wrap and turn) with your favorite short row method.

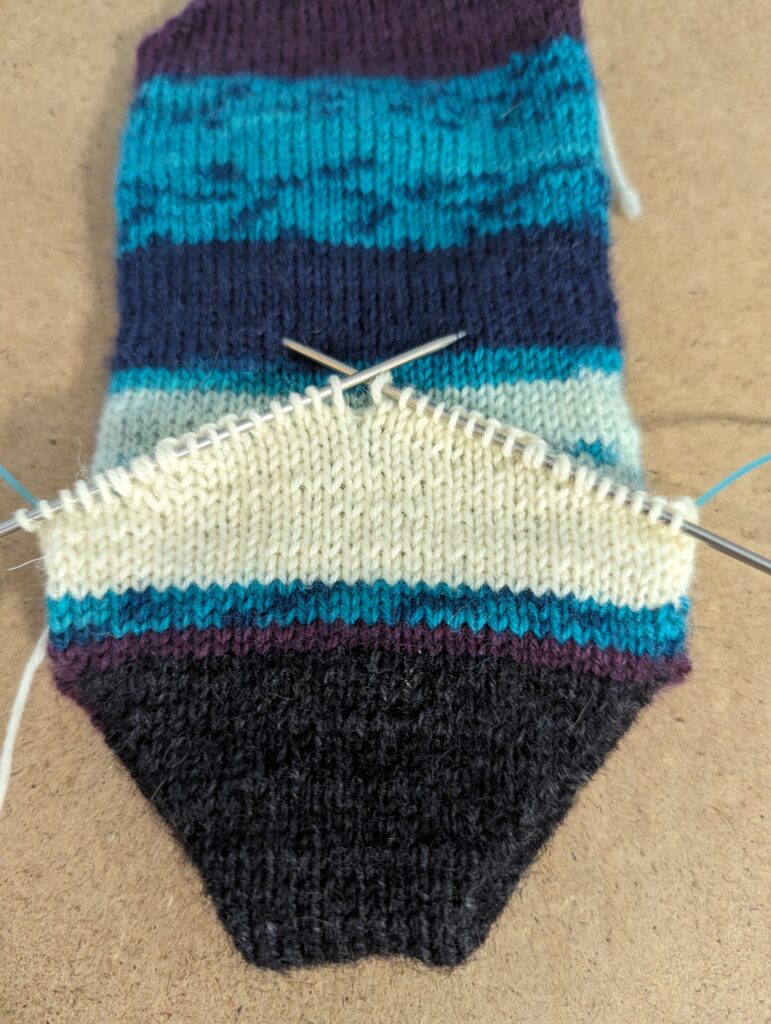
Boomerang:

  • Knit across to first st after all the wrapped sts
  • Place marker before the first wrapped st
  • Pick up the wrapped sts as one
  • w&t
  • Purl across to the first st after all the wrapped sts on the other side
  • Place marker before the first marked st
  • Pick up the wrapped sts as one
  • w&t
Mini Heel — It looks a bit funny with a second heel

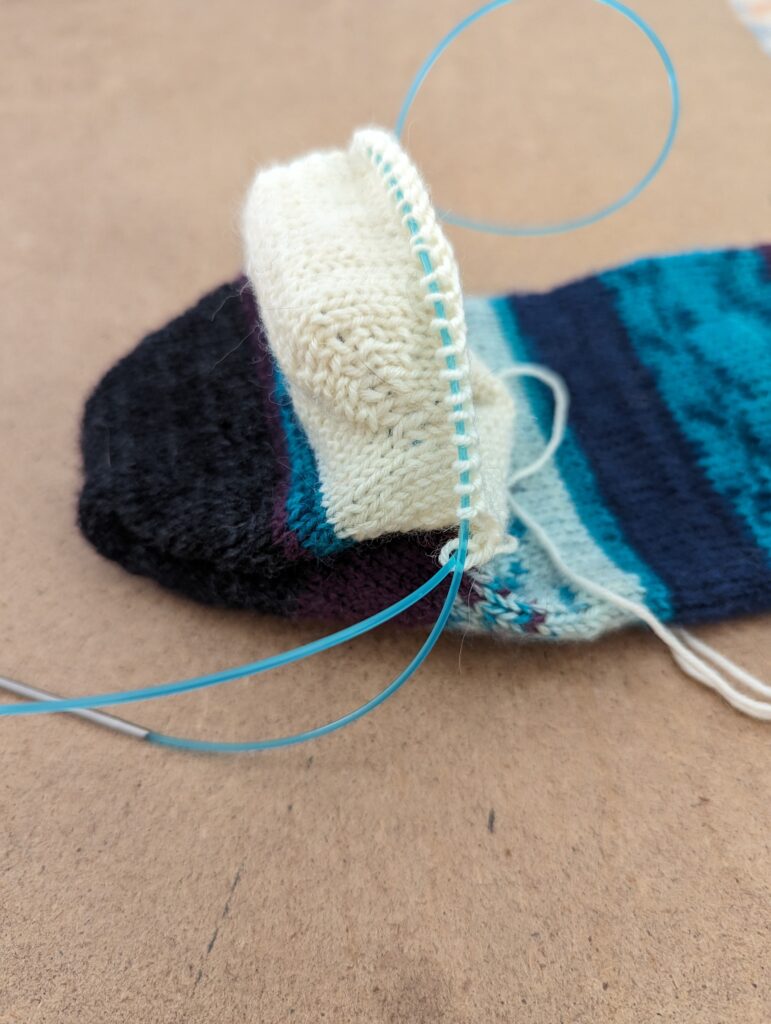
Second Half of the Heel Tab.

  • Knit to marker, remove marker, w&t
  • Purl to marker, remove marker, w&t
  • Continue until you’ve reached the wrap from the Boomerang row. You should have 4 sets of short rows on each side.
  • Knit across to the end, picking up your wrapped stitches as you iapproach them.
  • Continue in the round to the front of the sock. This is round 1.
  • Continue with the back, picking up the wrapped stitches.
  • Knit 4 additional rounds, 5 rounds total.

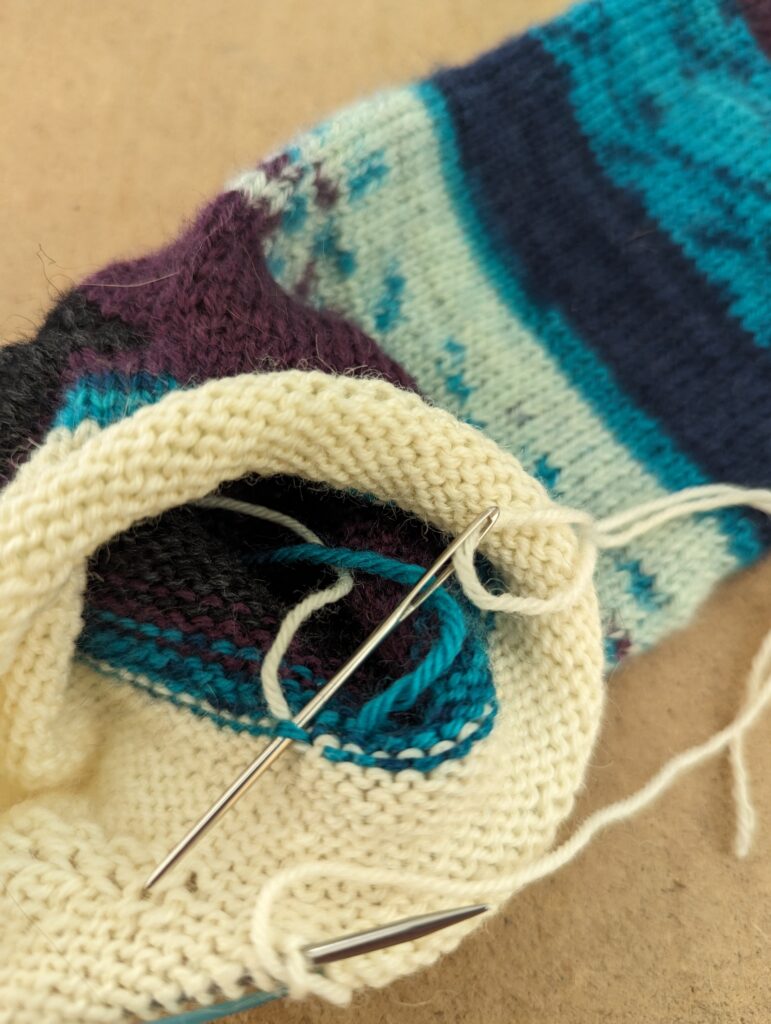
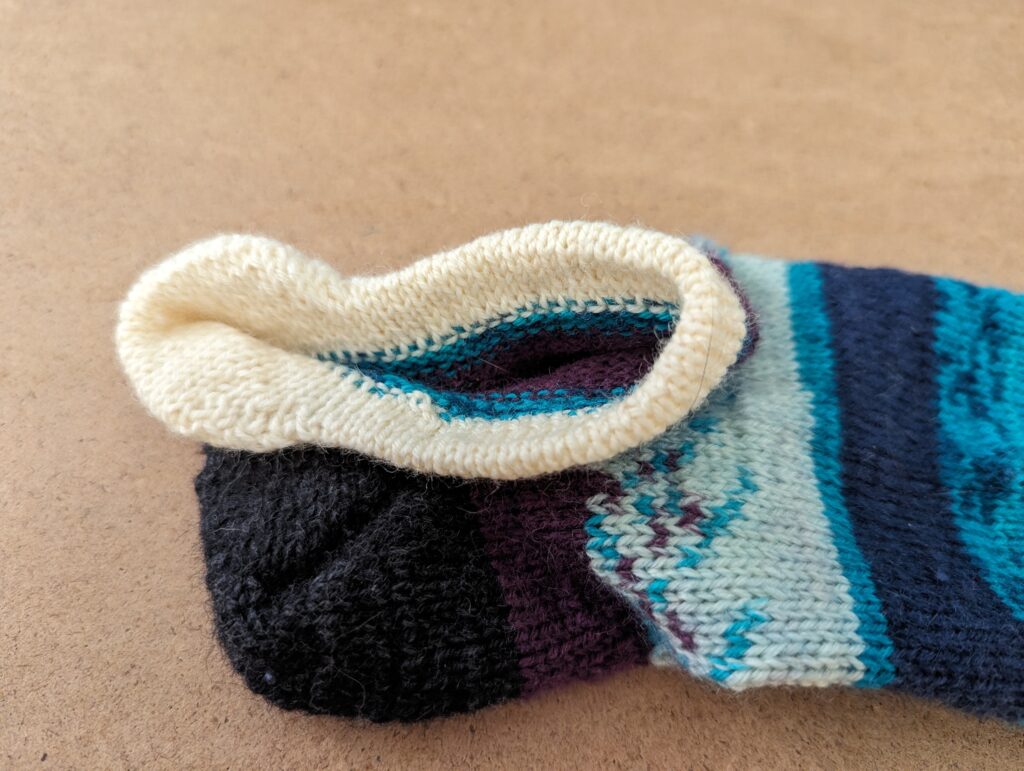
Sew down the heel tab. I tried whip stitching down the live stitches but I just didn’t like how it looked. I settled on a mash up of kitchener and whip stitch.

I don’t know what type of knitting magic this is but yes, you read the instructions correctly. 8 rounds before you start the heel tab short rows and 5 rounds after make an even flat hem without any bunching. Trust the process.

  • Cut yarn about 3x the circumference of the sock and put it on a tapestry needle.
  • Insert needle into the first st as if to purl, pull through but leave the stitch on the left needle.
  • Slip the threaded needle through the first purl bump in the corresponding column 13 rows below.
  • Insert needle through the first st on the left needle as if to knit, slip the stitch off the needle
  • Insert needle through the next stitch as if the purl
  • Repeat until the entire tab is sewn down

If you changed yarn/color for the heel tab, it’s easy to locate the corresponding purl bump for the beginning of row as well as the line of purl bump to pick up as you sew the hem down. I find this to be easy on these aging eyes.

Without this, I found it was all too easy to sew down slightly askew or get off course once I get going.

Besides, I really like the look of a white trim on my socks.

Not only is the result nice and tidy, it’s also extremely stretchy while maintaining a nice tidy hemline without any extra bulk.
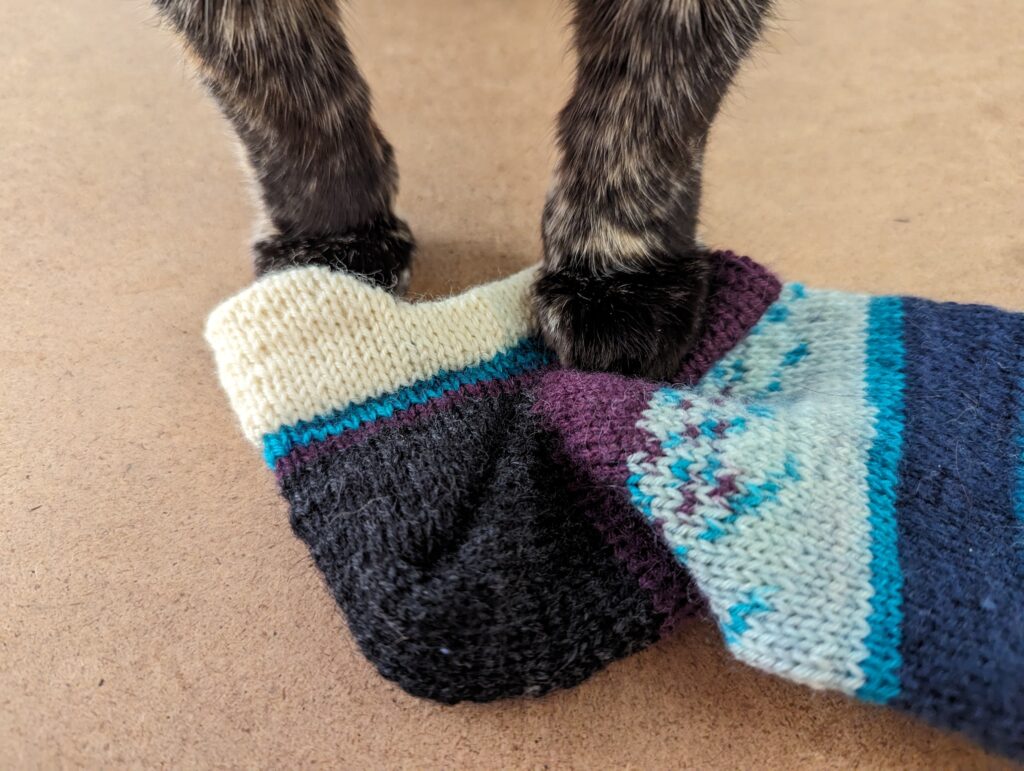
It even has Stormy’s Paw of Approval

No Show Socks

I have had an obsession with shorty socks for years. According to the blog history, my first experiment was back in the beginning of 2008. Since then, I’ve experimented with more variations on the same theme, including just plain anklets.

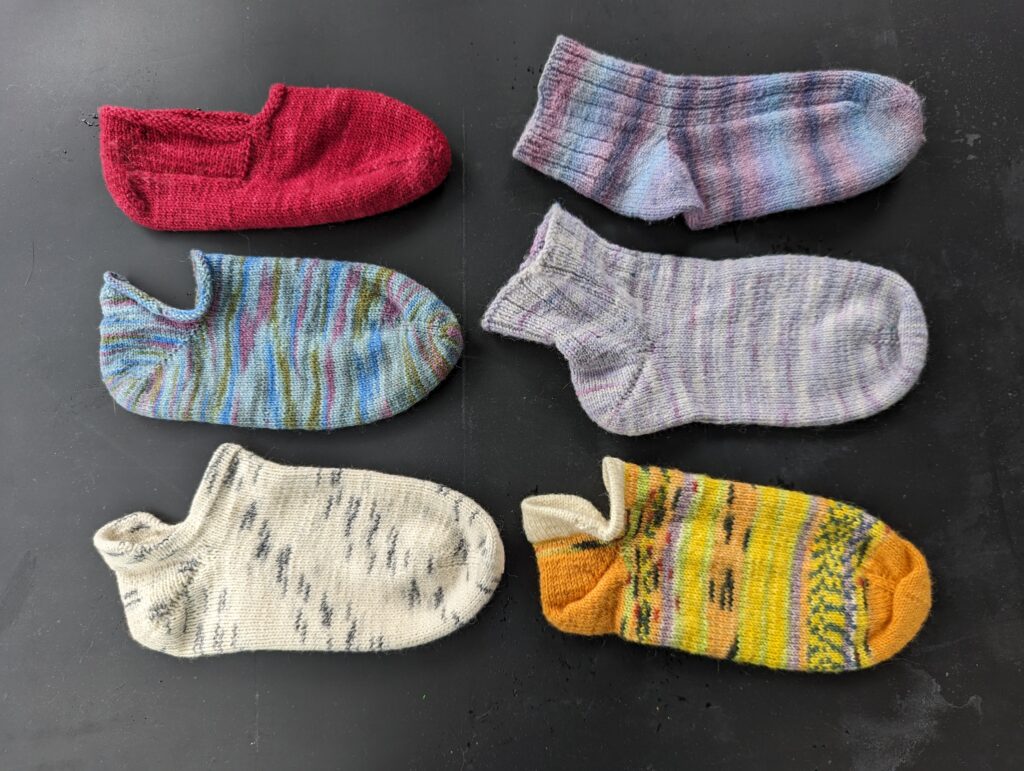
Top Left: Turkish Bed Socks in Koigu
Top Right and Middle Right: Anklets
Middle Left: Tennis Socks circa 2008
Bottom Left and Right: Faux-mbas

The Turkish Bed Socks were fun to make. To wear? They tend to slip off unless they are in heeled clogs. I haven’t worned heeled Danskos in years so they aren’t all that practical since they tend to slip off in regular clogs.

The original tennis socks are still great, but the roll top will sometime slip down into my trainers and are not high enough for my trail shoes. There is not enough fabric in the heel to prevent rubbing during a hike longer than 2 miles.

The anklets work great, but they do show. They are great for “no show” when I’m wearing my short dress boots. Just high enough to ensure the boot top doesn’t rub my skin. But with my trail shoes, there are a bit more showing than I like. They cause funky tan lines during summer hikes.

The socks in the bottom row are results of my current iteration, my take on the Bombas Ankle Socks. These came about when the Universe came together to push me into revisiting my standard sock recipe. The first event was when I was talking to Anne. She was knitting socks from all of her leftover sock yarn to stash down all the leftovers. The second event was when I saw Jodi’s stash of Bombas socks. She raved about how much she loved them. The bright color blocks of the socks reminded me of Anne’s stash busting socks.

Literal light bulbs went off. I could knit my own Bombas socks from scrap yarn! The bottom 2 socks are my version of Bombas socks (aka “faux-mbas”). I love them — both knitting and wearing them. They are a bit like potato chips. I can’t stop at just knitting one pair. I’m on my 4th pair now.

I’ll go into more details on my exploration and final recipe for these socks in the next post, as well as some tips and tricks if you want to try some yourself.

Eeeeeelaasticity

It’s winter in California. This means that flip flops and sandals must give way to something a bit more substantial. I bought some really cute ankle boots for fall & winter.

Unfortunately, one of the pairs did not play nicely with socks. Even though I bought wide, the shoe is still snug across the bridge. This leaves little to no room for socks — stockings/tights, yes, but not socks.

The tops of the ankle boots were rubbing. Without the protection of socks, my ankles were very uncomfortable by the end of the day.

To solve the problem, I thought I’d make a pair of boot cuffs. I tested the idea out by using a pair of long wristlets I had laying around. The idea had merit, but the cuff kept riding up, rendering it worthless from the the ankle protection perspective.

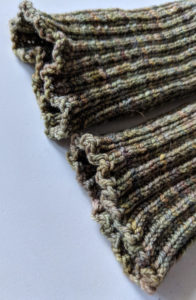
L: German Long Tail Cast On, Jeny’s Surprisingly Stretchy Cast Off, Cabled Cast On, and Zimmerman’s Sewn Bind Off
R: Jeny’s Slip Knot Cast On, Jeny’s Surprisingly Stretchy Cast Off

Then I remembered that 80s fashion wear — stirrup pants (remember those??). I set about to knitting a pair of stirruped ankle cuffs.

The wristlets were also tighter on one edge than the other — cast on or bind off edge — I can’t remember. But they were not even. And that bothered me. That will never do.

I pulled out some leftover Malabrigo Sock and set out to make some cuffs using elastic cast on and bind off. First stop, Jeny’s Slip Knot Cast On and Surprisingly Stretchy Cast Off at the heel and Zimmerman’s Sewn Bind Off at the top. (right cuff)

Heel detail

I wasn’t happy. The slip knot cast on had a very tidy edge, but it didn’t match the cast off edge. The cast off was all ruffly and stretched out. The cast on edge in the heel (row after I casted off for the heel) was more refined (slip knot cast on).

Top: Zimmerman’s Sewn Bind Off
Bottom: Jeny’s Surprisingly Stretchy Cast Off

So, when it was time to cast off at the top, I chose Zimmerman’s sewn bind off. Yuck! It was all ruffly in a bad way. It didn’t follow the 2×2 rib as closely as I would like (not unexpected, but I didn’t expect it to be this ugly.)

So, onto the second cuff. I decided to use the German Long Tail to start. It matched the cast off edge a bit better.

All streeeeeeeetched out!
Top: Slip Knot Cast On
Bottom: German Long Tail

But how did the elasticity differ? Actually, not very much at all.

Confession: I attempted to take a picture of the stretched bound off edges at the top. It wasn’t until I started writing this post that I realized that I have photo of a top and bottom, not top to top. Oh well.
(Click on link if you want to see. As you can see, the stretch is fairly consistent cast on/bind off edges.)

Forget all that technical stuff, did the cuffs do the job????

Yes and no.

Yes, the cuffs are keeping my ankles from getting chaffed.

No, the stirrups are … dare I say it? too stretchy. The stirrup on my right foot kept sliding out from under foot and up the back of my foot. Did it have something to do with the cast off/cast on at the ankles? I switched the cuff/feet part way through the day to check, but the right stirrup is still slipping off.

It has something to do with how my right foot moves when I walk.

In any case, the 2×2 ribbing under the arch is too loose. I can do one of 2 things: (1) less stitches at the stirrup, or (2) something other than ribbing; something not as stretchy width wise — perhaps garter stitch.

Of course, by the time I finish with all my experiments and have the perfect stirrup cuff pattern down, the boots may stretch out enough to wear regular socks.

Stay tuned.

P.S. I just had a thought. I am a knitter, damn it!! I can knit the feet with finer yarn at a smaller gauge then switch it up to thicker yarn/gauge for the cuff when I get there. The question remains, though, do I really want to knit fine gauge socks (finer than my usual 8-9 sts/in)? I think I already know the answer to that questions.

Page 1 of 88

Powered by WordPress & Theme by Anders Norén