Random thoughts of a fiber enthusiast - mostly fiber related, sometimes coherent

Category: FO Page 4 of 48

Baby Surprise Jacket!

BSJ

Don’t you just love those stripes???? The stripes were in the dyed into the fiber. All I did was split it in half lengthwise and spun the yarn as a 2 ply. You can see the yarn in progress in my previous post, Miracle Fabric. Unfortunately, I ran out of yarn about one color repeat short. I had to finish it off with some Cascade 220 Superwash. It’s slightly denser than my handspun but it worked. Now, I just need to add buttons.

This was such a quick and fun knit. Much more fun than the first time around. Why? Minimal ends to weave in. Unfortunately, I didn’t take notes the first time around either. I zipped along on the sweater before I realized that I forgot to increase for the cuff fullness. Riiiiip.

To ensure I don’t make this mistake again, I decided to write out line by line instructions for myself. After a bit, I wanted stitch counts. So, I stopped once again and built a spreadsheet that calculated my line by line and my ending stitch count by row. Yes, I’m a geek. Anyway, I think it took me longer to build the spreadsheet than it did for me to knit the darn thing. It helped that I took the train into the city to have a tea and chat session with Penny.

Stats:

  • Yarn: Handspun and Cascade 220
  • Needles: US #4 (3.5 mm) 32″ or 40″ circulars; these were perfect length to work all the way around with enough room to leave the side stitches on the needle while working the center back panel

A few knitting notes on this BSJ (so I don’t lose my notes and have to start all over again next time!):

  • I used double decrease around a center knit stitch so the decreases match the increases.
  • I used a 2 stitch I-Cord all around.
  • I made 3 - 2 stitch buttonhole in the I-Cord edge. (3-2-8-2-8-2)
  • At the bottom corners, I added a single (unattached) I-Cord stitch before and after the centered/corner stitch to make it a clean turn.
  • At the neck corners, I added 2 (unattached) I-Cord stitch to ease the corner.
  • I grafted the end of the I-Cord to the 2 cast on stitches at the beginning.

Wash Day

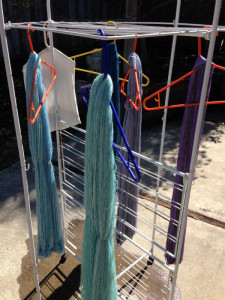
WashDayI love wash days around here. It’s so colorful. Several of these skeins have been sitting around, waiting for their turn in the bath.

I have a new strategy for setting the twist. I squeeze the water out of the skein with my hands but I don’t spin the water out nor roll it between towels. I just put it on the hanger and let the weight of the water to weigh the skein. I have found that this does a great job of removing any kinks without losing the liveliness/bounce of the yarn since the weight (water) is removed as the skein dries.

Of course, this works better during the summer than it does in winter.  However, I have rigged up a second shower rod in the guest bath centered over the tub and a few inches from the ceiling. This allows items to drip dry into the tub without messy water everywhere.

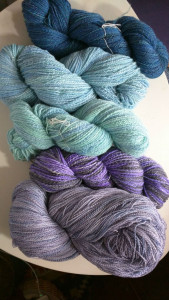
SkeinsHere they are, all dry and put away. Pretty, aren’t they? From top to bottom:

  • Rainbow Farms Pygora: Loch Ness (50/50 Pygora/Cormo), Seattle (60/35/5 Pygora, Merino, Silk). 4.23 oz, 512 yds, 2 ply. Spun and plied on Tina II.
  • BFL (purchased at Whidbey Island Spin In, can’t find label): one skein more blue, one more minty green. 462 yds (6.03 oz) and 522 yds (6.32 oz) respectively. Spun on Matchless, plied on mSpinner.
  • The Wacky Windmill: Gloomy Day, Superwash Wool (feels like merino). 4.26 oz, 270 yds. Spun and plied on Matchless.
  • Fibermorphosis: Superwash Merino. 11.11 oz, 1,456 yds, 3 ply. Spun on Matchless, plied on mSpinner.

New Slippers

I have really been enjoying the monthly guild felting group. This month, we decided to make slippers. Good thing too, since my favorite wool Haflinger slippers gave up the ghost a while ago. I had the felt insert replaced but it was beyond hope when I wore through the toe. It had a good 20 year run. I should be happy. My replacement Acorn slippers, sadly, did not last nearly as long.

SlippersForm

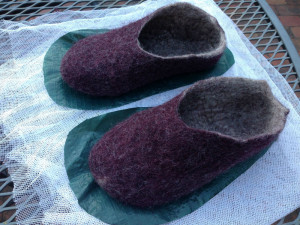
Here’s what a couple of hours of work look like. The green plastic underneath is the form I worked from. The trick to removing the form is to cut a slit that is large enough to pull the form out, but not too big since the hole will enlarge as you continue the felting process. I should also add that you need to make the slit large enough to easily put your hand in and turn it inside out as you complete the felting process. That’s why there is such a funky dog ear at the heel because I had to cut again after fighting it for a while.

I did the final fulling with the slippers on my foot so there is a definite right and left slipper. I got a nice self foot massage in the process. Bonus!

SlippersTrimmed

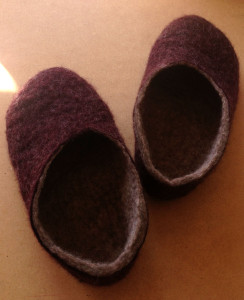
Here it is after I trimmed it once it is fully dried. As you can see, the edge where I trimmed was much fluffier than the edges that did not need trimming. This is because the edge was felted down and the body was less felted down. I want to weave a tape to cover up the cut edge to hide the inconsistent width.

The finished slippers weigh less than 2 oz. Yes, less than 2 oz of wool. I plan to wear these at the loom this winter. I don’t want to worry about wearing through the sole so I will sew on a few pieces of leather on the bottom.

Hopefully, the leather will add more weight to these slippers. Why? They are light enough each that Stormy thinks they are part of her toy collection and she carries them around. Each morning, I find them in a different part of the house than where I place them the night before.

20150713

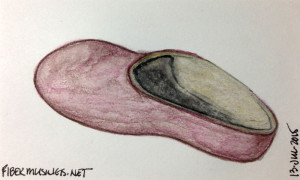
An ICAD based on one of the slippers.

Page 4 of 48

Powered by WordPress & Theme by Anders Norén